Monday, June 24, 2013

DIY wall texturing

We tore down the basement wall, and it left a big mess we had to fix.  We have had people come and texture our walls in the past, but we haven't been satisfied with their work.  My husband and I decided to do it ourselves this time.  Jeff has always done the walls on his own.  Fairly simple.  He put up new drywall, mud, and used the orange peel texture spray found at Home Depot.  The ceiling was another matter entirely.

We had a funky texture on the ceiling that couldn't be matched with the texture rollers, so we got some mud, and paint scraper, and went to work.  It was so much easier than I thought it would be. I put the mud in random patterns, let it dry then sanded it smooth.  Now that it is primed and painted, you can't even tell there was a wall there or a hole in the ceiling.  It looks super great, and blended right in. Pin It

Thursday, June 20, 2013

A little bit of demo

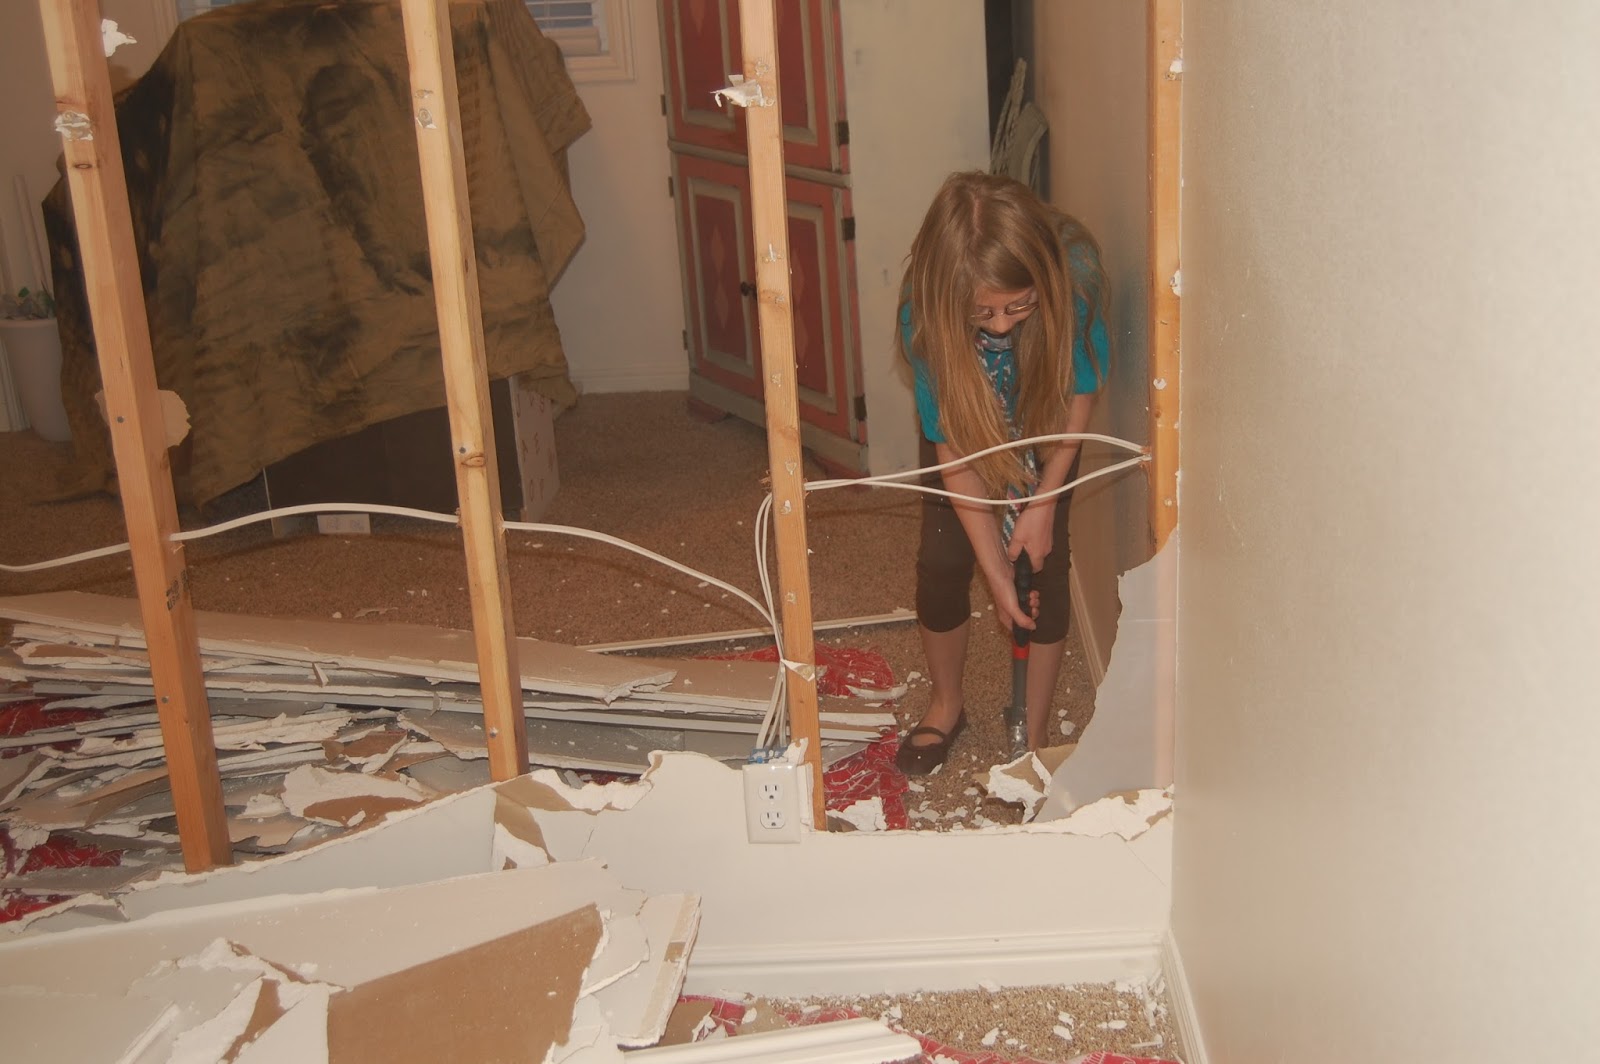
There has been a little bit of demo going on around here. I  didn't like the floor plan in our basement. It felt like it was just a maze of rooms. We did not need one of the rooms by the stairs, so we decided to tear out the wall and make it one open space.  We didn't need a family room right there, we have a theater room in the basement already, so we decided that a great craft space would be awesome for our family.  Here is the floor plan and what it looked like before we took out the wall.
It was a small room and the hallway felt even smaller. So we took our hammers and ripped the wall apart. Of course being careful of all the wires and turning of the electricity first.
It was a family affair.
We took out all the wood and framing. There is just one supporting piece that has to stay. I think a column at the bottom of the stairs will solve that problem. It looks so much more spacious now. A great blank canvas for a fun craft room for the family. It opened the basement right up, and it became a relatively easy fix to our basement floor plan dilemma. Pin It

Wednesday, June 19, 2013

Nothing says welcome like color

I love colorful front doors. My friend and I are on a movement to start a colorful front door trend in our neighborhood. I think that nothing says welcome like the color of your front door.  I had recently visited Paris and was inspired by the doors that looked like this.

I loved how all their buildings were mostly cream, and they used the color of their door to express their personality. Beautiful.
I came home and decided to paint my front door a bright turquoise. It is important when choosing a paint color for your door, to make sure it compliments the brick or siding color of you house. The brick on my home is a red color, and my siding is cream.  I got some paint swatches and decided that this color would go great. This is a picture of how the door started white.

Here is the turquoise door. I think a color just brings a house to life.  Just a few weeks ago I decided to go with a different paint color for my door.  I wanted a change for my porch, and I thought an apple green would do the trick.

I decided to keep the side lights white this time and let the door just speak for itself.  I still have kept my turquoise by spraying my clock and pot, and I added some red accents to match the brick. I love the colorful accents, it looks summery and fun.
  Some painting tips I use: Most of the time I use left over paint I have around my house. The turquoise was from my son's room, the green is from a bathroom.  I don't always use an exterior paint because my door is protected and I paint so often.  If your door is not protected, use an exterior paint. I use a satin finish. You don't see the brush marks as easily, and I like how smooth it turns out. Basically it is personal preference. I like to paint early in the morning before the sun is shining directly on the door. A foam roller works great to roll and get that sprayed look. Make sure to prep. Sand any areas that are rough, wash the door, and tape around any areas ( I love frog tape).  Always remove the hardware.  Nothing is worse that paint on hardware.  Don't be afraid to paint the front door. Go bold and have fun. After all, it is just paint.

Pin It

Tuesday, June 18, 2013

Taking it outside

It has been a while since I have posted. It is not because I haven't been busily working away in my home, but because I have been busily working away outside my home.  I have been working as an aid at a school this past school year.  I can't believe how much time I don't have to do things like blog when I am working.  I have missed blogging. I use this blog as a journal of sorts, and I enjoy recording my decorating experiences, and looking back on them.
That being said, I am excited for the Summer! Time! We have been working hard in our yard these past couple of months.  Last year I cut out and put curbing in my whole yard. We didn't finish planting everything last year. That has been what we have been doing all spring. Here is what the yard looked like before. Keep in mind, when we moved in, the whole backyard was just dandelions. My husband and I purchased this house when there was still snow on the ground, and moved in when there was a bunch of weed. Needless to say we freaked out just a little.


We pulled out all the bushes in the front, worked hard on reviving the lawn in the back, and added new flower beds.


I love planting perennials. I love that they are low maintenance and come back every year. I have had great luck planting the perennials in my flower gardens, and keeping my annuals in my pots. I also like using mulch around the plants. It keeps the weeds down, and I hardly ever have to go out there and weed.  I enjoy watching the flowers grow, and the yard grow and evolve. I love adding and moving and taking away each year.  Yard work defiantly makes me happy! Pin It

Tuesday, March 19, 2013

Trimmed out and finished exercise room

I am back ready to post pictures of our finished exercise room. We added some molding which I chose to use and replace in the whole house. I can't believe how much molding finishes off a room every time we install it. This room turned out great. I love the soft gray color, the carpet tiles which are perfect to put heavy exercise equipment on, and it is way fun to have a space to work out in.
It may inspire me to go down and use it sometimes!


Pin It

Thursday, January 10, 2013

A delicious soup recipe for a cold day

It has been freezing here lately. Below zero temps.  When it is that cold outside, it just makes me want to put a pot of soup on.  I love any kind of soup, but this one is one of my favs. This is the soup that got my hubby to marry me.  I made this for him on our second date, and after that he was hooked.  You know what they say, the way to a man's heart is through his stomach. So true.  It is warm, creamy, comforting, and delicious, and the best part, my kids love it!

Not the best pic, but here is the recipe.

Potato Soup
6 medium potatoes peeled and sliced
4 carrots peeled and diced
6 celery stalks diced
2 quarts water
Put all vegetables in a pot with water and cook until tender, then drain
Meanwhile, after vegetables are cooked take
1 chopped onion and sautee it in
6Tablespoons butter
When the onion is soft add
6 Tablespoons flour
1 tsp of salt
1/2 tsp of pepper...more if you like it spicy
Cook together for a minute and add
1 1/2 cups milk
Stir the milk in until thick then add the cooked vegetables
Add store bought chicken broth until soup is desired consistency
Add more salt and pepper to taste, sprinkle grated cheese on top, and enjoy!
Pin It

Tuesday, January 8, 2013

working on the exercise room


Don't you just love this lovely peach color! This room is in my basement and was probably used as a craft room. It had a lovely flower wallpaper border which we removed, and the flooring was foam tiles. Got to love it all! 


 We chose a light gray color for the walls, then found some carpet tiles for the floor. These are the coolest things.  They stick down with adhesive tape, and are so quick to install.  I love the pattern of the different tiles in the room to give it some interest and dimension.  We are using the room for our exercise equipment, so we didn't want regular plush carpet.  This is perfect!
 There was this funky florescent light  on the side of the room. It must have been over a desk. We removed the light and installed this cool ceiling fan to keep the room cool when we exercise.

Just a little molding, and this room is ready to use.  A fun, and inexpensive room reno. Pin It