Wednesday, January 14, 2015

Giving things new life


I love finding items and giving them new life. Creating something with them to use them a different way than was intended. It is a fun creative outlet.  This project was actually my hubby's idea. We had bought this lantern at Hobby Lobby to use as an accessory on a shelf in our room. We were looking for a lamp for our night stand and decided this would work great as a lamp.  With a little drilling and electrical it became a lamp just like that. 


Another fun idea is to re purpose old windows or doors as picture frames. I found a window that fit 8x10 mats to display some pictures in our room.  I used wrapping paper I got from Tai Pan for the other panes. Easy, easy, easy way to display pictures in a room or hallway.
Re purposing things adds fun and creativity to any space. It is also a fun and economical way to use and recycle old items. 
Pin It

Monday, January 12, 2015

Master bedroom reveal

I am so excited to show my finished master bedroom. This was a fun transformation for us. Things came together easily, and I love the change the room gave to my home.
Here are the before pictures.


This room was a blank canvas. It had cream walls, an awful ceiling fan, and no personality. So we transformed the space.


We painted the room the same color as the bathroom, painted the molding of the ceiling a paint color two shades lighter and painted the trim the ultra bright white we used through the whole house. We took down the crown molding and created some lower molding, installing LED lights behind it to light the ceiling at night. I got rid of the ceiling fan and found this great orb light that matches the style of chandelier used in our bathroom. I re purposed and painted a lot of items in the room. I love using things that have meaning, especially in personal spaces like bedrooms.  Re using what you have and re purposing things just to fit a particular space helps add personality and character to the room. We love how this room turned out. The color is so calming, and it is a perfect space to relax in at night. Pin It

Thursday, January 8, 2015

My Ikea hack

So here I am again posting another fun thing from our bedroom. This is my first Ikea hack, and I am excited to share it. When we were first designing our room, we wanted some book shelves to go on either side of our fireplace.
I found these at Ikea. They were just standard bookshelves stained a cream color. I knew I needed to paint them since the white clashed so bad with the white in my room.  So we went to work painting them....the first time. A beautiful shade of deep gray.

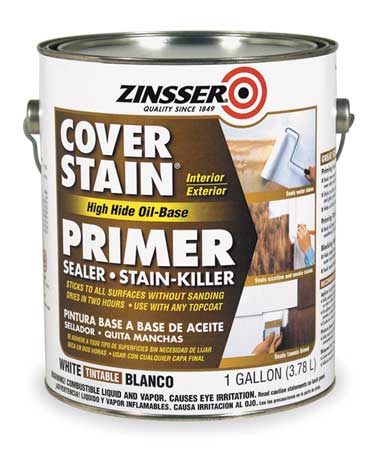
Notice, the gray is only on the insides.  We did not use any primer or liquid sand the first time, and after we painted the paint just peeled off the surface.  So we had to scrape everything off and start over. Not fun at all! For the second time around we decided to use zinsser primer...which I knew about....which I have used before...which I was stupid not to use the first time. Do not forget this step! It worked great.


When we took the bookcases into the room and put them next to the fireplace we decided that they didn't work there. We decided to screw them together like a hutch and place a piece of molding down the middle.  I took off the original backs and installed some V board to give the inside a more custom look.  I decided that since they were together and would be such a large piece in the room I wanted to paint them white and leave the inside gray.


The zinsser worked, the paint stuck the second time just fine, and I loved the way they looked in the room.


My husband added some lights the top inside, some glass shelves so the lights would shine through, and some crown molding on the top.  We also found some fun knobs to go on the drawers.  I am not going to lie, this was a lot of work, but way worth it.  I love how it makes the room feel comfortable. I love to read, and having my books in my room makes me smile every time I look at it. Pin It

Tuesday, January 6, 2015

Mixing some old with some new

December is over and January is a new month and a new year. December was a whirlwind for me this year, and although I got a lot done in my house, I didn't get a lot done on my blog.  We have been working on our master bedroom the past couple of months. My older post showed my room painted, and the ceiling painted as well. I painted the room Silver sage from Restoration hardware. I love the color, so calming and relaxing. One of the fun new additions I put in the room was a new fireplace. It is a real flame fireplace. It burns a real fire using cans of gel. It is clean, odorless, and you don't have to vent it. We love it.  Although it was beautiful and new, we wanted to add some character to the room. We had inherited a beautiful hand made piece of furniture from my husbands great grandfather. I knew that if we painted that and placed it on top of the fireplace it would be just the thing.

I went to work, It came already half painted, so I didn't feel bad about painting it white at all. I took a lot of time, and a lot of coats of paint, but it turned out beautiful.

Although the fireplace came white, it was a different shade of white so I painted that too.  I used my favorite liquid sand product, then just painted it with my white trim paint so all the white matches the room. I love how the top makes the fireplace feel like it has been in the room forever. We got it put together, and I went to work decorating it.
We decided that instead of a mirror in the middle of it we would put this fun Paris subway art since Paris is one of our favorite places to visit. I think it gave it a fun and unexpected look.

I love the character and history of old houses, and I love that re purposing a piece of furniture added so much meaning and character in my "new" house. Pin It

Wednesday, October 22, 2014

Half bath

So while we were doing our big master bath project, we decided to finish the half bath downstairs at the same time.


This is the room before the demo.  All I can say about it is EWWW! I have hated this room since the day we moved in.  The paint was brown...I hate the color brown, the floors were wood which the toilet leaked on and made it smell  great, and it was where all our guests went to use the restroom.  Embarrassing right! So let's just say, I was more than a little excited to demo this room!

 We ripped out everything including the floors. The room is small, which was great since it didn't take hardly any time at all.

We installed the same small black and white hex tile as we used in our bathroom. It was a pretty quick and easy install.  I found this vanity at Lowes and decided to paint it gray using the same liquid sand, primer and paint that I have used on my other cabinets.  We painted the walls a fun light aqua color and installed V board paneling on half of the walls. 

I bought this mirror at the Hobby Lobby for around ten bucks. It was on clearance because it had a little scratch on it.  I decided to paint it a light gray and distress it.  It added such fun personality to that room and was super easy to paint and finish.  I just used regular satin wall paint and brushed on a couple of coats.  After it was dry, I sanded it to show some of the black paint underneath.


Here is the vanity after I painted it. The gray paint made it totally look like an actual piece of furniture.

Here is the mirror above the sink.  The aqua color is actually a little less mint green, but there is no natural light in that room and it is hard to photograph.

Here is the sink part of the room.  I need to add some art on the long side wall, but over all I love how it turned out and I am no longer embarrassed to have my guests use our bathroom.  
Pin It

Tuesday, October 21, 2014

A little this and that

We are finished with the master bath project finally and have moved onto the master bedroom.  Last Saturday Jeff and I looked at each other and said we should paint the room...just go for it, just like that. It only took a couple of hours and we had ourselves a beautifully painted bedroom. I couldn't believe how quickly we got it done. I guess I was use to the bathroom project, long, messy, and labor intensive.  Not at all, this was quick, and fun, and exciting.
Here is the bedroom before paint.
Just a plain white room with this funky ceiling treatment.
We were originally thinking about putting up ceiling tiles on the ceiling, but decided that a little paint might do the trick.
We painted the walls the same blue gray color that is in the master bath.  I painted the wall color up the ceiling and chose a lighter gray color for inside of the trim.  This gives the ceiling an illusion of a trey ceiling. We took down the awful ceiling fan and replaced it with this fun orb chandelier I found in Boise over the summer.  Now I need to paint the trim, get a new bed, install the fireplace and bookshelves, add some finishing touches, and we are done! Pin It

Tuesday, October 7, 2014

Finish Master Bath Pictures

Finally...after almost three months my bathroom is done. I am so happy to have that room finished. This has been one of our hardest re models.  I don't know if it was because it was the start of school, or it was being up rooted and having my things in all different places in the house.  I also know that I don't deal well with messes, and this was a mess for quite a while. Anyway....here is the before...


And here is the finished bathroom.


I took a lot of different pictures. It is hard to photograph the room because of the orientation.  I love how it turned out...very calming and spa like. Now that it is done, it was totally worth it! Pin It