Showing posts with label color inspiration. Show all posts

Monday, May 4, 2015

Molding...tons of molding!


There has been a lot of work going on in our home the past few weeks.  Lots and lots of painting! I love adding wainscoting to a room, but it is a lot of work.  Cutting, sanding, caulking, priming, and painting two coats of white. But it is worth it! Here is a peek of how some of the rooms are coming along.
Here is the family room the day we moved in.  I am so so so over brown!

We took out the harth and added some molding around the fireplace.


We spray painted the brass grills on the fireplace and painted the whole wall white.


This is our dining room the day we moved in. I was so excited to have a dining room, but not one that looked like this!

We added some wainscoting to the bottom.


I painted the bottom half white, then it was ready for some color!


I went for red. I have always wanted a red dining room. I got rid of the antler chandelier, and hung a pretty crystal one instead.


Here is my living room the day we moved in.  Surprise, brown and boring!


We added some wood.


Painted it white....


and added some color! It gave the room a ton of character.

The last spot we added some wainscoting to was the upstairs stair landing.

We already re-finished the stair railings, and just by adding some molding, and a fun new light fixture, I have a totally fun, modern and updated space.
We still have a ton of work to do, but it is so fun watching everything come together and finally become something we love. Pin It

Friday, March 27, 2015

Accent walls

We have still been working on finishing the main floor wainscoting this past week. We have the fireplace wall done...not painted, but framed out, and I love it!
It started out a plain wall with just backer board nailed to it.  We then measured, measured again, and measured again until we came up with the right dimensions for the molding. We ripped four inch MDF boards, measured again, and cut them to fit.
Once the boards were ripped and cut we started assembling.  It went pretty quickly at that point.
We decided to trim around the fireplace with two inch boards.  I want the wall to have a clean look to it, so I decided to not have any stone or tile around the fireplace.
This is how it looks today.  I love the results.  We are going to caulk it, add crown and base moldings, then paint the whole thing white. I am going to add a wood mantle to it once the painting is done.
I think this added just the right amount of character to this room.

I love feature walls, they quickly become my favorite thing in a room.  I have been using a lot of molding, and light colors in this house, but I have painted a lot of feature walls in my other homes using bold pops of color.
This was a wall in my other home. We didn't use molding on that wall, but I used paint colors. I measured out the squares, taped them off, then picked my color pattern I wanted to use.  It was fast, affordable, and fun.  I just used those sample paints you can get at Lowes for three dollars each and went to work.  I love the molding, but there are a lot of other alternatives to do if you want to add a little personality to a room just by using paint.

Pin It

Tuesday, October 21, 2014

A little this and that

We are finished with the master bath project finally and have moved onto the master bedroom.  Last Saturday Jeff and I looked at each other and said we should paint the room...just go for it, just like that. It only took a couple of hours and we had ourselves a beautifully painted bedroom. I couldn't believe how quickly we got it done. I guess I was use to the bathroom project, long, messy, and labor intensive.  Not at all, this was quick, and fun, and exciting.
Here is the bedroom before paint.
Just a plain white room with this funky ceiling treatment.
We were originally thinking about putting up ceiling tiles on the ceiling, but decided that a little paint might do the trick.
We painted the walls the same blue gray color that is in the master bath.  I painted the wall color up the ceiling and chose a lighter gray color for inside of the trim.  This gives the ceiling an illusion of a trey ceiling. We took down the awful ceiling fan and replaced it with this fun orb chandelier I found in Boise over the summer.  Now I need to paint the trim, get a new bed, install the fireplace and bookshelves, add some finishing touches, and we are done! Pin It

Wednesday, August 13, 2014

It's gray and I love it!


Yay my walls are painted and I love the color! It is a soft gray tone with a touch of blue in it. I spent the day last week painting my wainscoting white, and I love the contrast of the two colors. I love trim, and I love it painted white. Just plain, clean white. The white I always use is ultra white from Behr right off the shelf, in a satin finish.  I find for myself that if the white is more of an off white, it tends to look dirty to me.


We picked two medicine cabinets in an oil rubbed finish for above our sinks. I am one who does like medicine cabinets. I have been living without them for three years now, and I have missed having all of my toiletries just above me ready to use. I love the storage it offers to a bathroom space. Just above my hubby built some beautiful trim I need to paint so we can install the lights.


Speaking of lights, I am giddy about this light we picked out for the center of the room. I love being able to have a pretty light in my bathroom. We are building a beam for it to hang on that matches the wood counter tops we are going to build. Can't wait to start that process. That is next, then tile, and then my favorite... all the finishing touches. So excited! Pin It

Friday, August 8, 2014

Adding some character


We are making progress! We took out the tub and installed wainscoting on the wall. Instead of having a jetted tub, we decided to go with a free standing claw foot tub. I love adding touches like wainscoting to a room. It makes the home feel like it has some extra character and history. I also painted some color samples on the wall. The color I am going with is the lighter gray blue. Silver sage from Restoration Hardware. I think it is going to pop against the white color underneath. I always get samples of the colors I want to paint and paint some on the wall. I live with them for a few days and see how the color changes in the light. It is a lot easier than painting the whole room then deciding if we like the color or not. Painting is next! My favorite part. Pin It

Monday, April 7, 2014

It's bright and I love it!

I am so close to being finished with my game room. We have been working on it for a couple of weeks, adding paint, wainscoting, desks, game tables...you name it. Except for the trim and a few touches the room is finally done. Here is the before...dull and boring. Just a blank space.


Here it is now...bright and full of color!

I wanted big pops of color in this room so I added a lot of turquoise, reds, and bright greens. It is a game room, so we wanted to make it fun.

We have a place to watch TV, do homework, and have fun playing games.


I found this table at the DI for 25 bucks. We sanded the top and stained it a different color, and I painted the legs a nice gray. I had the stain and paint in the garage, so this table was literally a 25 buck purchase.


I am so excited how this room turned out. It was a lot of hard work, but defiantly worth doing. We added personality to the walls by adding the wainscoting, and paint. We re used the couch, rocker and settee. I found the ottoman at Down East Home, and painted an existing table I had bright green.  I love re using what I have in my home to make the room affordable and give things I already have new life.  Just by adding new pillows my couch had a completely different look to it.  I love color and it was fun to just play with it in this room to make it a bright and fun place for the whole family to enjoy. Pin It

Thursday, March 13, 2014

Buttercream

Making progress on the bathroom and I am almost done. Just waiting on some finishing trim, and hanging some mirrors we bought, and this bathroom reno is done. The before...So so so awful!

Photo: Wouldn't be Christmas break without a little demo!

Now the after.

I got the vanity painted, the counter top in, and new pulls on the cabinet. I love how it turned out.  I painted the cabinet a valspar color called butter, and the walls school boy blue. We found the chandeliers at Ikea. We are still installing molding around the mirror, and found some cool black girly oval mirrors to install on top of the large mirror. The color choices were my daughters, but I love the softness of them and how girly it looks. Perfect for two girls sharing a bathroom.  Here are a few more pictures of the vanity.


The softer color in these pictures is a little more accurate than the first picture. I love how just a quart of paint transformed this vanity and made such a huge impact on this small space. I can't wait to get the molding and finish this whole bathroom! Pin It

Thursday, March 6, 2014

Throw back Thursday

My twelve year old daughter went to school today wearing leg warmers, ratted hair, purple eyeshadow, and everything else that entails dressing in the eighties.  It was throw back Thursday at her school today.  She was so excited, and it got me thinking about all the fun things I have worked on in all the other houses I have lived in.  Some of my favorite things to do when I move into a house is to add color.  As I am re doing this house, I love to see all the different rooms and color that I added to other places I have lived in.
This was one of my favorite views  in the entry as you walked into our home.  The whole main level was open and I painted it a yellow color.  I wanted to add some interest by adding a red accent wall.  I also painted my living room a soft green color on the walls, and almost a blue green on the ceiling.  Yes, I love painting ceilings a color, and often times a different color then the rooms.  I think it adds so much interest to a room. We added a lot of wainscotting in that house  I love how the white popped against the color. 
Here is just the yellow color looking down from our second floor.  I took the red and added a touch of it in my decor.  I also painted the stair rail.  It was oak, along with every piece of trim in that house.  It was very easy to paint, and stayed nice.  I always use a liquid sand product on my wood before I paint it and it helps it not to chip.
I love looking at all my pictures and seeing the projects I have done and the personality we have added to a home. I love color.  I haven't chosen as much color for this home, and I am thinking that I want to maybe add a little more touch of color to it.  It really is an easy and relatively inexpensive way to add your style and fun to any home.
Pin It

Tuesday, October 15, 2013

A flashback of color

I was looking through old pictures of my previous home, and I came across this one.
I soon decided that I seriously miss this wall and the dose of color that it gave to this space.  This square wall was one of the funnest painting projects I have ever done.  It was not hard at all, and it gave the wall pattern and dimension without having to hang wallpaper. The trick to it was to use a laser level and draw the squares out with a pencil.  Then instead of taping the squares, I just painted the outline with a painter's brush, and filled in the rest with a larger brush.  There was no touch up from pulling the tape and all my lines were clean.  Really, not that hard, I kind of found it relaxing.  Crazy, I know, but that is what painting does to me. This is a really fun, and easy project if you are looking for a way to add some personality to any room! Pin It

Thursday, August 15, 2013

It's a paint party

One of the first things we did for this theater room is to prime and paint everything white. I always use either Kilz, or in this case, I used Zinzer brand primer. It really neutralized that horrible blue color.  The can lights are in and waiting to be painted around, and all the molding is done and painted  in a pure white satin paint.  My hubby built the columns the go along the wall, and even added a little bit of light in them for a fun touch. He found LED lights that you can cut and have adhesive backing so he could stick them in the openings of the columns.  The shelves and console at the end of the room are going to be white, and the walls are going to be painted a smoky gray.
I always paint my ceilings. I think that they are as big of a feature as the walls, and I wanted this room to be no exception.  I chose to paint the ceiling the same butter yellow color that I  painted  in the rest of my basement.
This is a view towards the other side of the room. We kept the room as an actual theater room. It already had the step up for furniture, but the step went all across right to the doorway.  We decided to cut it out and make it curved to make the room feel less choppy.
I am really happy with both the color and the moldings. The columns my hubby did are awesome,  and I love the dark gray against all that white. Pin It

Thursday, August 8, 2013

Pop of color

We moved into this house two years ago with the intention of re-doing just about everything. This is not our first house reno and we are very seasoned DIYers. This house is just taking longer to complete than I hoped it would. There were a lot of not so fun projects that we needed to take care of first.  I was prepared to be patient, live with the house the way it was until we got to each room, but I couldn't do it any longer. I had to make a minor change on my main level to stay sane this winter.  I had to do something with the dark brown accent wall in my family room.  I majorly dislike the color brown, and I could live with it no longer.  I needed COLOR! So for the cost of one gallon of paint, shopping around the house, and some spray paint in the garage, I have a new room!
Here is the room before. Not bad, but the brown just bugged me. I loved the color of the shutter on the mantle, and decided that I would paint the brown wall that color.
Can I just say, so much better. It really lightened up that room and made it feel less like a dungeon. So with that project done, I needed a little more color other places.
I found this ottoman at an antique store, and had to bring it home.
These frames were in the basement, and decided to do a collage above my couch.

I sprayed them to add some color.
The room came together great. Quickly and without spending a lot of money. It no longer feels like a big brown hole, and I actually like spending time in that room. It is funny what a difference a little color can make. Pin It

Wednesday, June 26, 2013

Painting cabinets

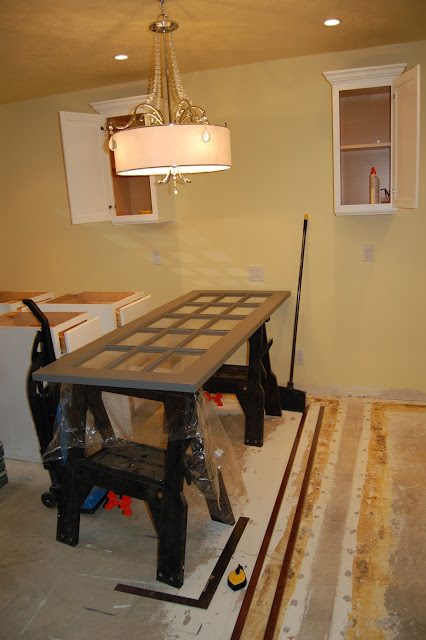
My room is taking shape and I am excited to get cabinets put in. We painted a valspar paint on the walls called butter. Yellow is hard to pick, and this is the perfect shade of yellow for me.  Not to bright, but still very happy.  I always paint my walls with an eggshell finish, and my trim with a satin finish. We decided to go with the unfinished stock cabinets for this room. I thought to myself, I will just paint them quickly and get them installed...no problem.  They are trickier than they look. I have painted so many finished cabinets in my day, and these are a little different.  First off, we had to sand the heck out of these babies.  Sand, sand, sand.  When they are smooth use a good primer. Paint one coat, then sand again. Paint another coat, sand, and then start painting your color.  I decided to go white with these cabinets. I know that there is special cabinet paint on the market, but I just went with a satin white wall paint that matched my trim color.  I wanted it to blend in with the trim, and look more like built ins. When I paint my cabinets, I always use a foam roller. It gives them a smooth spray like finish. I cut in with my brush, then roller with the roller. It may take a few more coats, but the lighter it goes on, the less drips you will have.
Here they are white, uninstalled. We added crown molding to the top of the uppers for a more high end look. I love how they turned out, for a fraction of the cost of custom cabinetry. Can't wait to show what is going to happen with that french door. Pin It

Wednesday, June 19, 2013

Nothing says welcome like color

I love colorful front doors. My friend and I are on a movement to start a colorful front door trend in our neighborhood. I think that nothing says welcome like the color of your front door.  I had recently visited Paris and was inspired by the doors that looked like this.

I loved how all their buildings were mostly cream, and they used the color of their door to express their personality. Beautiful.
I came home and decided to paint my front door a bright turquoise. It is important when choosing a paint color for your door, to make sure it compliments the brick or siding color of you house. The brick on my home is a red color, and my siding is cream.  I got some paint swatches and decided that this color would go great. This is a picture of how the door started white.

Here is the turquoise door. I think a color just brings a house to life.  Just a few weeks ago I decided to go with a different paint color for my door.  I wanted a change for my porch, and I thought an apple green would do the trick.

I decided to keep the side lights white this time and let the door just speak for itself.  I still have kept my turquoise by spraying my clock and pot, and I added some red accents to match the brick. I love the colorful accents, it looks summery and fun.
  Some painting tips I use: Most of the time I use left over paint I have around my house. The turquoise was from my son's room, the green is from a bathroom.  I don't always use an exterior paint because my door is protected and I paint so often.  If your door is not protected, use an exterior paint. I use a satin finish. You don't see the brush marks as easily, and I like how smooth it turns out. Basically it is personal preference. I like to paint early in the morning before the sun is shining directly on the door. A foam roller works great to roll and get that sprayed look. Make sure to prep. Sand any areas that are rough, wash the door, and tape around any areas ( I love frog tape).  Always remove the hardware.  Nothing is worse that paint on hardware.  Don't be afraid to paint the front door. Go bold and have fun. After all, it is just paint.

Pin It